


A step-by-step guide on how to integrate your WordPress site with OnTRAport. Forms, plugins, ONTRAPages, and GTM Tracking. Includes a video tutorial!
Integrating Ontraport And WordPress
Integrating Ontraport and WordPress is not a complicated process. Once you succeed, their integration will enable you to create testimonials, manage your clients better, update important information easily, connect forms, track pages, build client portals, and market your services in the best possible way.
Read through our guide and start implementing the integration best fit for your website today.
The Most Common Integrations
The reason external integrations are necessary is that it provides a way to automate things. You can get more done in less time because you’re able to integrate WordPress with Ontraport.
It also reduces the risk of human error. Sometimes we forget to send something out right after we post it on our blog and integrating Ontraport with our website, will allow us to automate many tedious processes we had to monitor manually.
Here are some of the most common integrations that will greatly benefit your website.
- Visitor Tracking: You can easily track who visits your pages, and not just that, you can also see what they click on and who referred them to your website.
- Accept Payments: You won’t need additional plugins. Ontraport can easily accept payment details for your products or subscriptions.
- Page Editor: You can easily drag and drop to edit your pages with Ontraport and publish them on WordPress easily.
- Memberships/Client Portals: You can manage CRM, payments, deliver products, and more with no additional developer or plugin.
- Better Customer Service: You can create a membership area where customers can check on their own payment details, product status, past purchases, and more. This allows for an improved customer experience and a reduced admin time.
- Affiliate Management: If you manage a partner program, you can easily share referral tools in the Partner Center and your partners can monitor their sales and commissions progress.
- Form Creator: You can easily create forms that will collect all the data and you can easily manage the data for future campaigns or other uses.
Using Ontraport Forms on WordPress
Let’s start our guide with a walkthrough of setting up an Ontraport form on your WordPress page.- Get your WordPress website and page. Here is mine: https://antarcticplumbers.xyz/
- Open up your Ontraport
- Got to “Contacts” > “Forms”
- Click “New Form”
- Click “Ontraform”
- Choose a template or start from scratch. I’m going with a template.
- Make all the necessary edits to your template.
- Click “Publish”
- Let’s go with “Embedded in Page” this time.
- You have your code ready to place on your page!
Elementor Option (recommended)
- Go to your Elementor page editor.
- Search widget “code”
- Choose the “HTML code”
- Paste your code!
- Go to your page.
- Add block > code > HTML code
- Paste your code!
We Recommend Making all Top of Funnel Forms on Your Site Native Ontraport Wherever Possible
A top funnel form is at the awareness stage. This is when people are just starting to get to know you.
A couple of top-funnel items you can promote are guides, e-books, newsletters, challenges, free trials, and other educational content.
In your TOFU (top-funnel) form, you want fields such as name, email, phone number, and anything else that might benefit your future campaigns.
Reason for This Recommendation
A top funnel form rarely brings in revenue, but it is a great opportunity to collect data on your prospects. Once you have their details, you can continue to engage with their interest by further introducing your product and services.
You can also alert them to any event or specials you might offer down the line.
Why is this so important?
Ensuring a solid Ontraport cookie placement for first conversion points assists with all analytics and closed-loop attribution management.
Generally, our recommendation is that if you have an advanced analytics tool connected to your CRM (Hubspot, Ontraport, Pardot, etc) then you should use the native forms wherever possible.
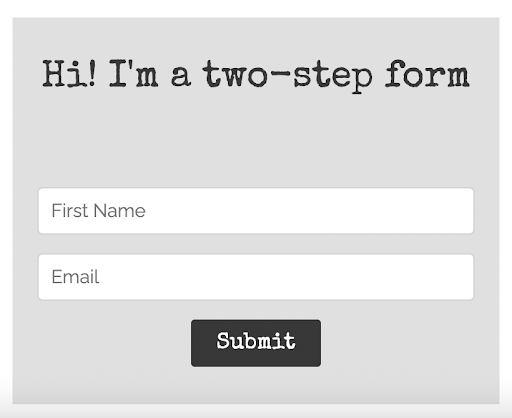
Pro Tip! You don’t want too many fields as it will decrease your conversion rate. Instead, you can do a two-step form so you can have all the fields you want while still collecting as much prospect data as possible.
First Step:
Second Step:

Multiple Ways of Implementing
Guides & E-books: Instead of publishing pieces on your website, you can have them on PDF and prompt a form on the “Download” button. That way, it’s a win-win for you and for them.
Newsletter: This is the most basic of all top-funnel forms. Newsletter subscription forms are usually placed in the footer of your website. They will submit their email because they want updates from you from time to time.
Challenges: If you are selling a lifestyle, health programs, or any other educational activities, you can invite prospects to join a free periodic challenge.
Free Trial: If you provide services, a free trial is a great offer to start getting deeper insights into your prospects.
Connecting Non-Ontraport Forms From WordPress to Ontraport
There are various non-Ontraport forms you can integrate. Let us walk you through each of them.
Our Recommended Non-Ontraport Form is Gravity
There are many benefits to using Gravity Forms. For one, they include an easy user interface and will customize the look of your form’s design. A lot of them also have built-in spam protection to help you stay on top of these annoying spammers who like to send out mass messages in comments or e-mails. The best benefit of using a forms builder is that it will help you keep your information organized and stored in one place. This can be extremely important for people running a blog or business because there are plenty of benefits to keeping all of your data and information in one place. They also offer many advanced features such as adding a read more button, multiple submit buttons, and adding validation to your fields.
- Make sure you have your Gravity Form Plugin
- Prepare your gravity forms, get your fields ready.
- On your WP editor/Elementor search for Gravity Form
- Add your Gravity Form Block and choose which form you want
Managing The Integration With Zapier (Easy but Costly)
- Connect your Zapier account with your Ontraport
- On your Zapier dashboard search for “Ontraport”
- On the next page, search to pair with “Gravity Form”
- Follow the instructions on Zapier
Zapier makes everything easier as you can see in this video:
Zapier pops up instructions here and there, they do the tests for you, and their fields are very user-friendly.
Of course, all of this doesn’t come for free. Zapier requires a monthly payment to be made and you can choose from the range of different plans they offer.
Zapier comes in handy especially if you know that you will be modifying your forms and integration time and time again. Or if you handle multiple websites or events that occur often.
If you are going to set it up once but you don’t know how to do it without Zapier, it’s worth it to invest in a one-time developer to help you get things set up.
Managing the Integration with Webhooks (Harder, but Cheaper in Long Run)
Another option for you is Webhooks. You won’t spend any additional cost but it does need a certain level of knowledge to get this done. Simply put, you can follow the steps below.
- On the Gravity Form settings, set up a Webhooks to send a request to https://antarcticplumbers.xyz/api/?webhook=gravity_form_1. The Request Method is POST, the Format is JSON, and the Body to ‘All fields’.
- On the API/ directory, set up a code that uses Ontraport PHP SDK https://github.com/Ontraport/SDK-PHP.
- Create a new API Keys on Ontraport on Administration/Integrations page.
- Process all the form fields and pass them to Ontraport using the saveOrUpdate() method.
If you are still having difficulties setting it up, well maybe we can help with that.
Installing Ontraport Tracking Code
Aside from connection and integration, you can also track your Ontraport forms. Let us show you how.
Using Google Tag Manager
The first method to use is Google Tag Manager, when managing a website google resources are the first option to choose.
After you have created the Trigger on the Google Tag Manager account, follow the steps below:
- On the Google Tag Manager account, go to the Overview tab menu on the left side.
- From the top right location of the page, look for the GTM account number, that looks like this format: GTM-ABC123, click this to reveal a popup window on how to install it.
- From the popup window Install the Google Tag Manager, copy and paste the code which is needed to be inserted to theandof the website you’re working on.
- If you’re working on a WordPress site, installing the codes can be done easily with the “Insert Headers and Footers” plugin which is located on WP Admin → Settings.
Using Functions.php (Coding Required)
If you’re not a fan of Google Tag Manager, or you prefer codes in general. You can use Functions.php to set up your tracking.
Simply follow the steps below:
- Go to Ontraport’s Administration → Advanced Features and toggle ON Tracking and Deep Funnel Conversion Tracking. Doing this will add in 4 new fields on Contact’s Lead Information section, GA Client ID, GCLID, Facebook fbc, and Facebook fbp.
- On WordPress, install AFL UTM Tracker plugin. This plugin will save all the UTM variables to cookies.
- On the webhook listener code, add in the code that will save the UTMs to your Ontraport Contact creation process. The UTM variables will be automatically added to the Gravity form with the prefix string starting with ‘_afl_wc_utm_utm_[UTM variable name]’. gcid, gclid and fbc UTMs will be also passed from the form after submissions.
- You will also need to create a PHP code block that will update the First (First Campaign, First Lead Source, etc.) and Last (Last Campaign, Last Lead Source, etc.) UTMs variables on Lead Information section as they are not saved during the contact creation process. This code will search the equivalent integer value of the UTMs to the UTMs objects and update them if found.
- To check if tracking is working properly, open your browser on Incognito mode, go to google.com and on the search bar, type in your domain name, e.g. antarcticplumbers.xyz and click the website from the result. This is necessary to gain a GA Client ID value.
- Go to the page where the Gravity form is located to test the submission. You will need to test two times to ensure that both the First and Last UTMs are saved properly. Use the following links consecutively, it contains different mock UTM variables, gclid and fbc.
You can also ask a developer for help.
Using a Plugin to Insert the Code (We recommend against)
If you prefer to use a code to track your forms and do not have a handy developer who is ready to help, you can use plugins to install your code. All you will need to do is copy and paste your code and select where you want it to be installed.
A plugin is not recommended as it may fail to install your codes, and there is no easy way to check if you have successfully installed your code. In addition, future errors might end up pushing you to seek developer expertise anyway.
But if you are persistent and still want to try out plugins to help you install your code. Here are some of the most common code installing plugins you can integrate with your wordpress website:
- Code Snippets
- Easy Custom CSS/JS
- Head & Footer Code
- Simple Custom CSS and JS
- Simple Custom CSS
- My Custom Functions
- Custom CSS Pro
Using Ontraports WordPress Plugins
We mentioned that you wouldn’t need additional plugins once you integrate your WordPress with Ontraport. Well, Ontraport has a plugin that will help you manage the integration easier. Below are some of the most beneficial Ontraport plugins for you to have on your website.
PilotPress
Ontraport Pilotpress is a free plugin for WordPress that lets you send email updates relevant to your blog posts. You can use Pilotpress to notify subscribers about new blog posts or let them know when you publish a new post-related product, such as an ebook or video course.
You’ll love this integration if:
- You use Ontraport to communicate with your customers and clients through email marketing
- You want to provide subscribers with actionable insights related to your latest blog posts and products in real-time
- You need a simple way to send automated follow-up emails that will keep your readers engaged and coming back for more articles
Create Membership Controls for Your WordPress
Step 1: Make sure your PilotPress Plugin is installed in your WordPress
After you have created the Membership Levels and have connected the WordPress site to Ontraport, you can follow the steps below to add a Contact as a member.
- On Ontraport, go to the Contacts tab and click the contact you want to add.
- Click the Memberships tab on the left tab menu.
- Click the +New WordPress Membership button.
- A new block will appear below it. Provide the necessary details.
- On the right-hand side, click +Add to add the Contact to a membership level/s.
- Hit the Save button when done.
- You can now use the Contact’s User Name and Password to login into a PilotPress page that has the same membership Access Levels on WordPress.
Let us know if you ever have any questions or need help to set it up.
Create Client Portals
Client portals have been becoming popular over the last few years. They are a way for companies to give their clients end-to-end support without them having to contact customer services or speak with employees at your company. Client portals allow you to make changes on behalf of the client in real-time, which saves you both time and money.
Pilotpress can easily turn your WordPress website into a client portal.
The setting up of the Ontraport page will be quick once you’ve finished setting up all the designs and the layouts of the page on Ontraport.
Steps To Set It Up:
- After you have finished building the page on Ontraport, click the Publish button and select the ‘Publish to WordPress’ option.
- Click Save & Publish.
- On WP Admin, go to ONTRApages, then click Add New button.
- Add the page title on the ‘Add title’ textbox and select the Ontraport page on the ONTRApages section below it.
- Select the Access Levels from the PilotPress Options on the right side.
- On Error select the Login page.
- Click Publish.
Create Affiliate portals
Affiliate marketing is a type of performance-based marketing in which a business rewards one or more affiliates for each visitor or customer brought by the affiliate’s own marketing efforts.
Many companies offer opportunities for web publishers (bloggers) to join their affiliate programs. A blogger has an interest in increasing sales on a particular product and so decides to include a link to that product from their blog. If someone clicks through from the blog post to buy that product, then the blogger receives a referral fee (typically 1-25%) of the sale price.
Affiliate marketers will need a portal that is a bit different from a client portal. Pilotpress can help you set up an affiliate portal and client portal separate from each other.
After following through with the initial Ontraport setup. You also want to make sure that you have everything else ready including:
- Products
- Emails
- Landing pages
And so on. When you have everything ready, you can easily set up your pages and connect them with your Ontraport.
A professional affiliate program will have automation, and Ontraport can give you just that. When you are ready, you can set campaigns to welcome your affiliate, congratulate them on completing a sale, motivate them when they are slacking off, and more. The limit is only your imagination.
If you need help or have any more questions. Please feel free to let us know.
Ontrapages
Step 1: Make sure your ONTRApages Plugin is installed in your WordPress
Host Landing Pages Built From Within Ontraport
With ONTRApages you won’t need to set up a subdomain for your landing pages. Previously we know that the main benefits of using a sub-domain are:
- Testing ground: with a subdomain, you can mess around without disturbing your primary site before releasing an additional part (landing page) of your website.
- Previews: You can have an entirely different design on your landing pages in subdomains and give your page a different feel without having to get to another domain.
- Appeal to different users: You can separate sections of your website and focus on a certain group of prospects with your landing page on a subdomain.
Now, with ONTRApages, you can do all of the above without needing a subdomain. You can edit, make adjustments, and preview on Ontraport before publishing your page through your domain.
An example of the benefit would be seasonal promos. You could have one /sale slug and change the content of your landing page. You can have spring, summer, fall, and winter landing pages in your Ontraport and swap them out.
Check out the tutorial.
Setting Up Your ONTRApages
- Go to your WordPress dashboard
- Go to “ONTRApages” > settings, and follow the instructions for “connect”
Once you are ready, you can start the next step.
Setting Up Your Landing Page
- Prepare your landing pages in Ontraport
- Make sure they are published
- Click “Publish”
- Choose “Publish to WordPress”
- Save and Publish
- In your WordPress Dashboard go to “ONTRApages”
- “Add new”
- Fill out the title of the page, the slug, metadata, and so on.
- Then, all you need to do is choose the Ontraport landing page you want to publish and you can change it anytime you want.
Benefits:
Now you can create and publish your pages without needing help from your developer or IT. You can push and change content anytime you want. You can easily manage all your pages in Ontraport without having to tinker around in WordPress.
Taking It A Step Further
Yes, Ontraport integrations may seem daunting at first, but after going through this guide, I’m sure you can see the various benefits the integration will bring. Not just that, you’ve also seen the simple guides to walk you through the integration.
But the question still stands. Can you do more? The answer is YES!
Our Custom Build Utilizes Ontraport Custom Objects with WordPress Custom Post Types
What is an Ontraport Custom Object? Well. an Ontraport Custom Object allows you to store even more information on your contacts and other data you might be storing in Ontraport. This can be super helpful if your business heavily relies on Ontraport to store and manage data. Your custom object can then have relationships that are one-to-one, one-to-many, and many-to-many between other objects.
A WordPress Custom Post Type works similarly, where it helps you group certain types of pages together. By default, you would have a Page and a Post on WordPress, you can then create your own custom post types. To get a sense of when a CPT will come in handy, take a look at schema and see the different pages you can have.
Let’s take an example for this to be digested better.
If you’re working with members and member groups. You can set up a page that will help you a ton. Once you have the ACF and the Ontraport Custom Object fields aligned, this is where the magic happens.
You can create new groups, change the name, or even delete it. And your members will see it on the webpage, with no further help from your developer. Your members can choose and select which group they want to join and you can monitor in Ontraport where each member is.
You can also set it up with a campaign to send out an email to welcome them to the group. You can set limits in Ontraport, so when a certain number of people have entered a group, the group will be full and automatically members can no longer click the button to join the group.
Say you store all your information on Ontraport. And you don’t want every staff member to be able to access the data, and yet, they need some of it to complete their daily tasks.
Ontraport can help you present that data on a website, on a protected page, or through their portal.
Let me illustrate the flow. So when a customer has requested a quote. Instead of monitoring it inside Ontraport, you can have it set up on a protected WordPress page. Your staff can then see the quote and follow through with it. All without logging into Ontraport.
Want to make an internal client portal using WordPress and Ontraport? SAdding a CO-CPT (we know it's a mouthful of an acronym haha) can really supercharge your user experience. Need proof? Buy something from us and take a look at our client portal! It is built with Ontraport and WordPress, using the CO-CPPT methodology.
Now that you’ve heard a bit about it, let’s see how you can build this.
Begin Controlling Your WordPress Content Right From Within Ontraport
Now you can see that your website is no longer limited. Anything you want is deliverable by understanding Ontraport. Did you have something in mind? Let me know if you have an idea you’ve been struggling to implement.
Looking to build an integration between these two platforms? You have come to the right place